> ## Documentation Index
> Fetch the complete documentation index at: https://studio-docs.prem.io/llms.txt
> Use this file to discover all available pages before exploring further.
# Get Started With Datasets
> Learn how to upload, generate, manage, and use datasets in Prem.
# Creating a Dataset
In Prem, you can build datasets in two ways:
* **Upload an existing dataset** in `JSONL` format.
* **Generate synthetic datasets** directly from different input sources such as files, YouTube videos, websites, or a mix of sources.
## Uploading a Dataset
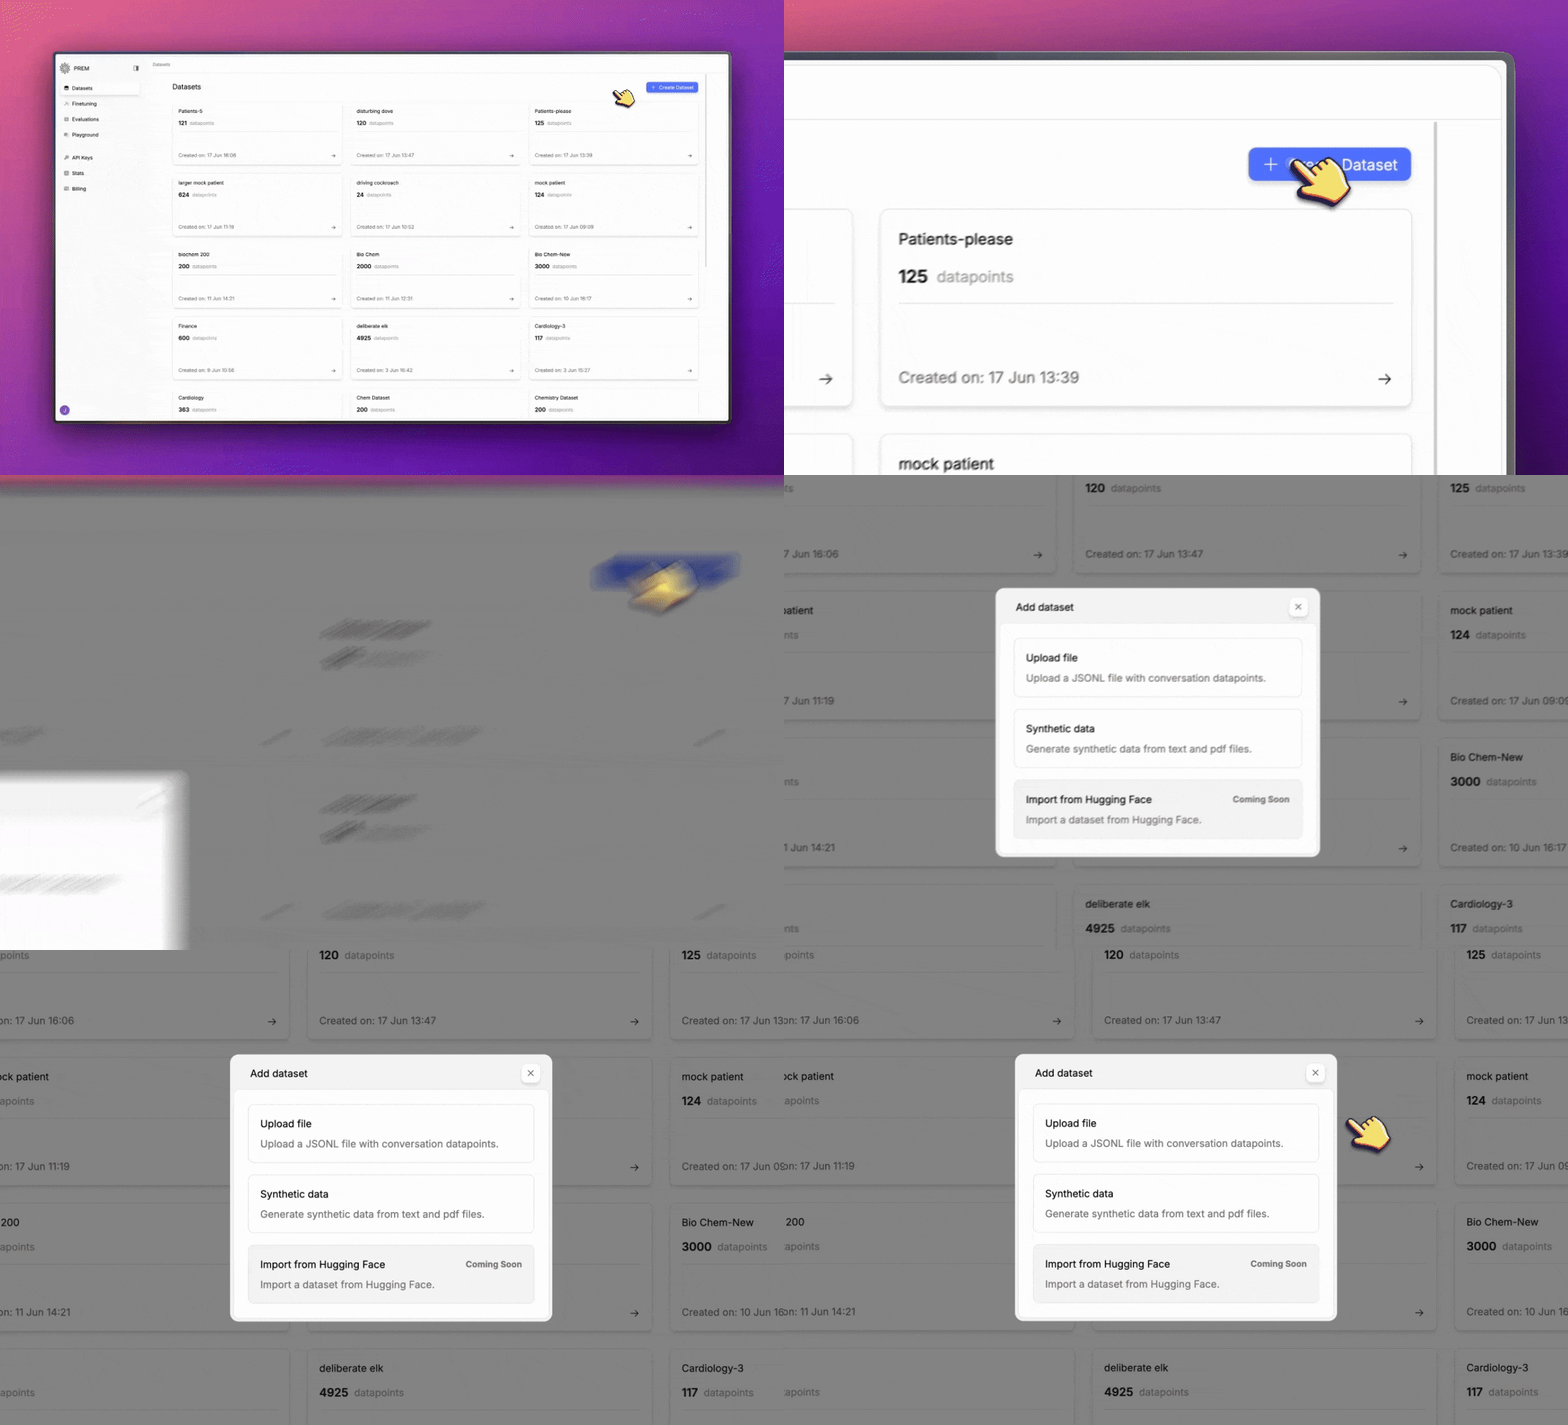
Click the **+ Create Dataset** button in the top-right corner of the page.
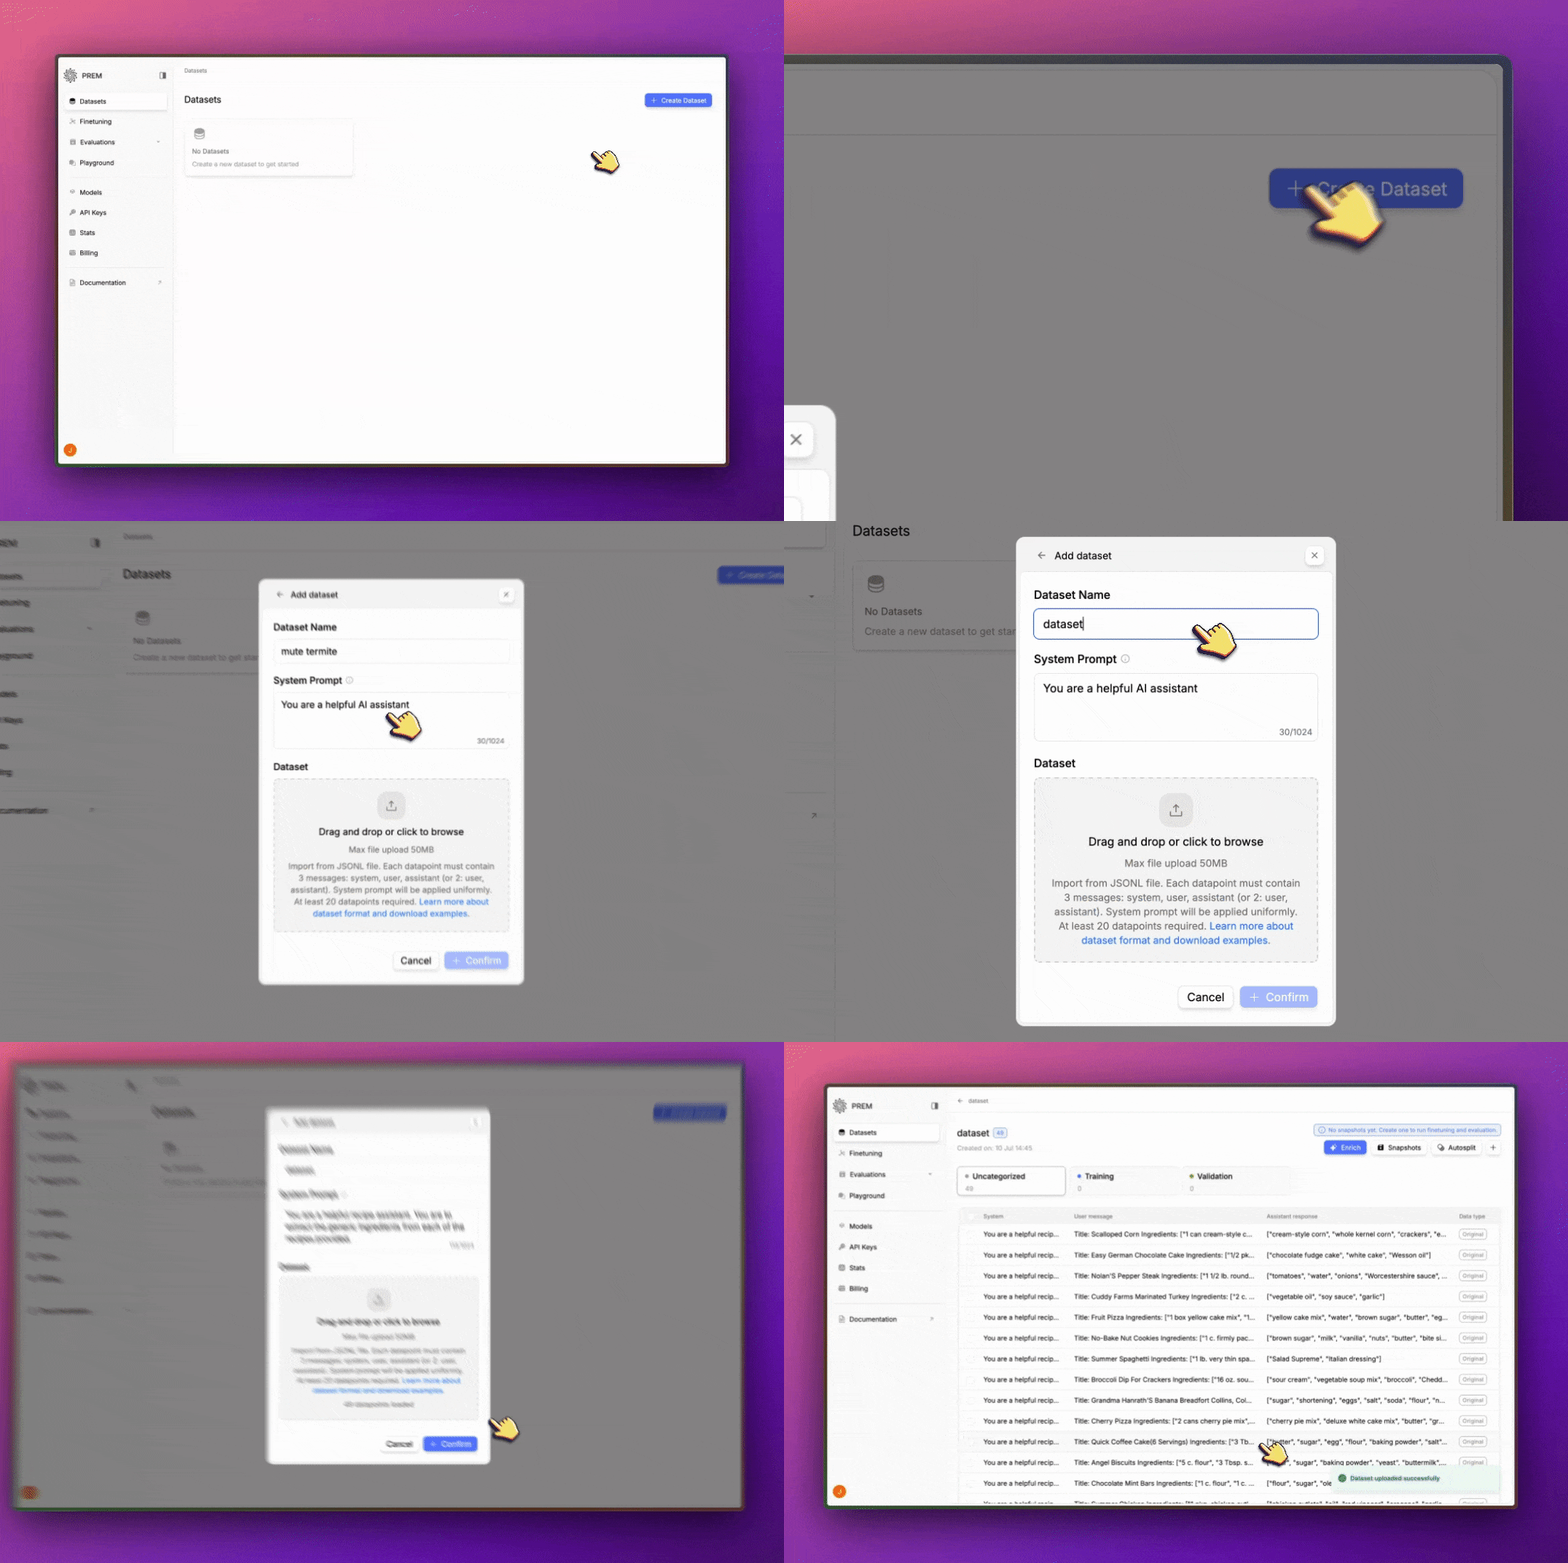
 * Enter a name for your dataset.
* Upload your `JSONL` file.
* Click **Confirm** to create the dataset.
* Enter a name for your dataset.
* Upload your `JSONL` file.
* Click **Confirm** to create the dataset.
 Refer to our [Datasets](/datasets/overview) documentation for more information on the `JSONL` file format.
## Generate a Dataset with Synthetic Data Generation
Synthetic data generation lets you create datasets from various input sources beyond JSONL. You can import documents, scrape websites, process YouTube videos, or combine multiple sources into one dataset.
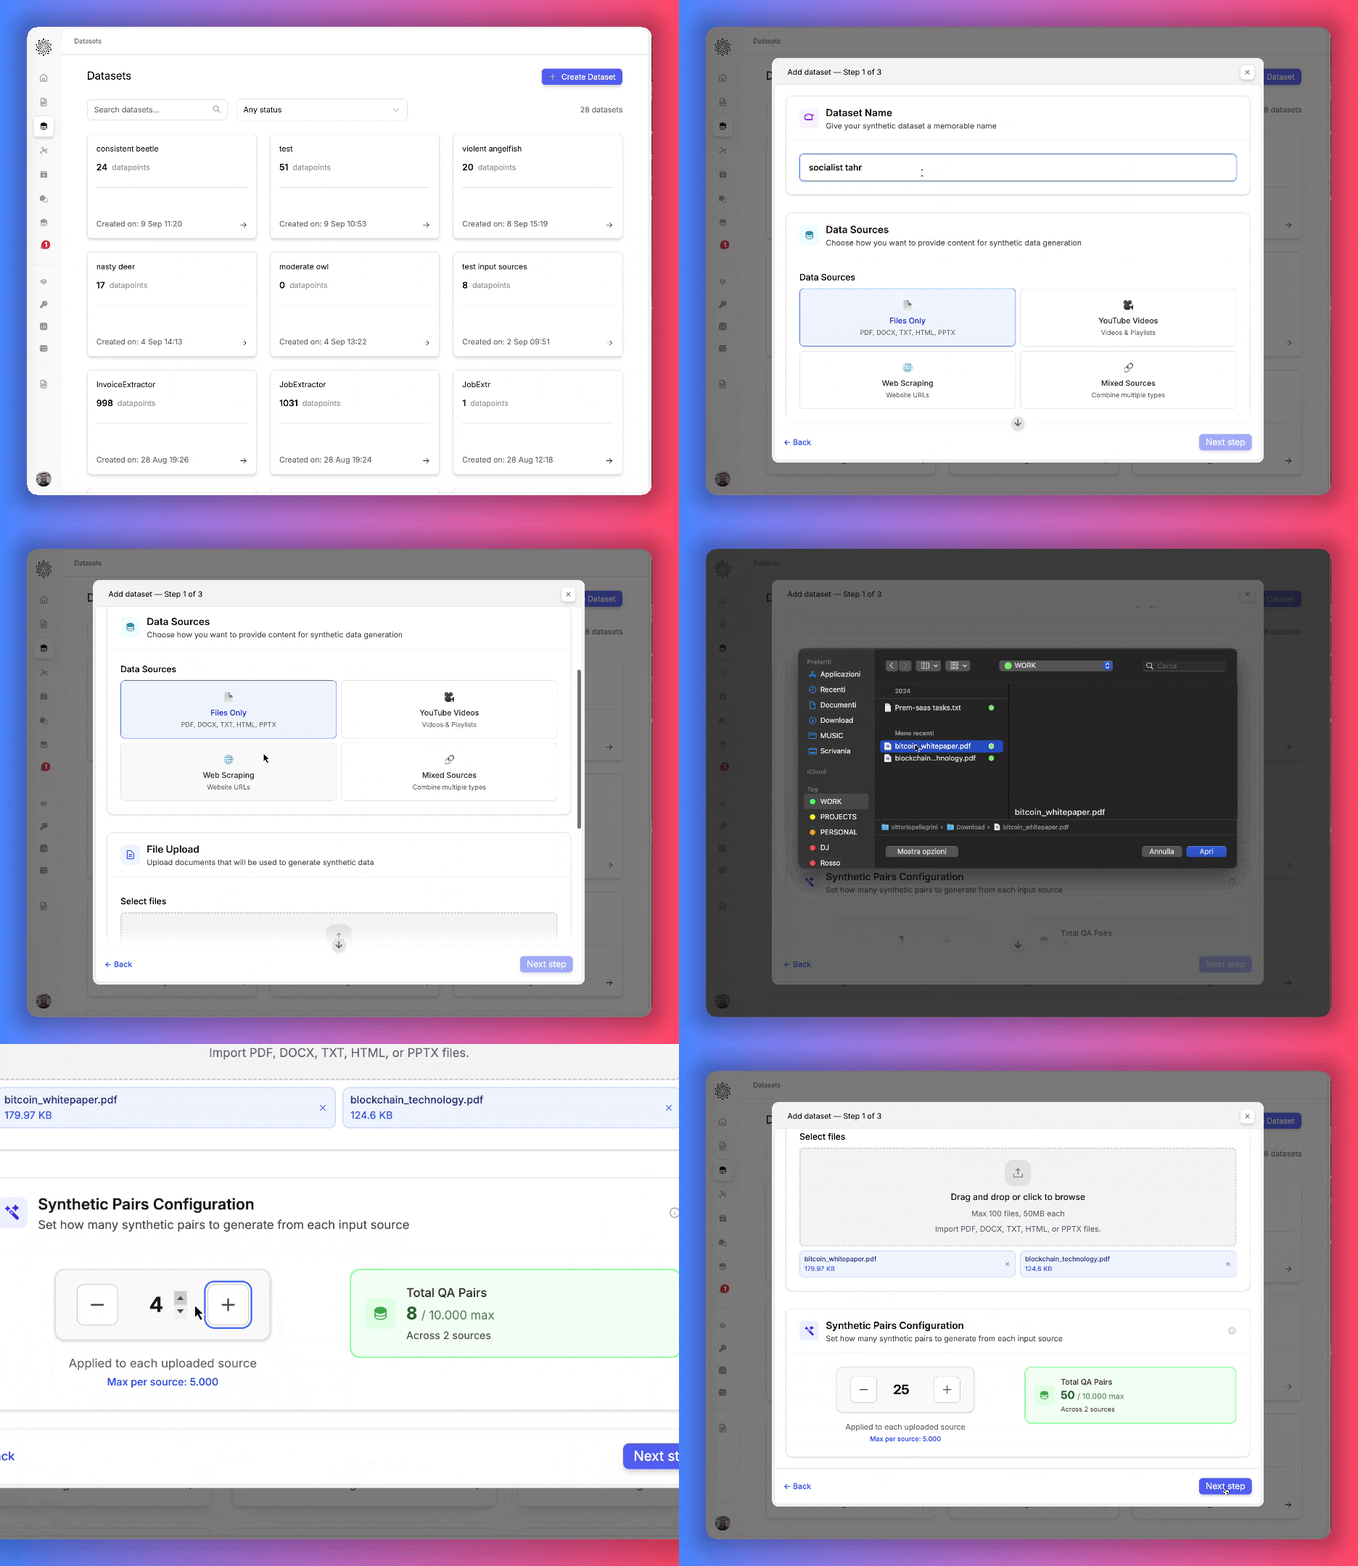
* Enter a descriptive dataset name.
* Choose one or more data sources:
* **Files Only**: PDF, DOCX, TXT, HTML, PPTX
* **YouTube Videos**: individual videos or playlists
* **Web Scraping**: one or more website URLs
* **Mixed Sources**: combine multiple input types
* Set the number of QA pairs to generate from each source.
Refer to our [Datasets](/datasets/overview) documentation for more information on the `JSONL` file format.
## Generate a Dataset with Synthetic Data Generation
Synthetic data generation lets you create datasets from various input sources beyond JSONL. You can import documents, scrape websites, process YouTube videos, or combine multiple sources into one dataset.
* Enter a descriptive dataset name.
* Choose one or more data sources:
* **Files Only**: PDF, DOCX, TXT, HTML, PPTX
* **YouTube Videos**: individual videos or playlists
* **Web Scraping**: one or more website URLs
* **Mixed Sources**: combine multiple input types
* Set the number of QA pairs to generate from each source.
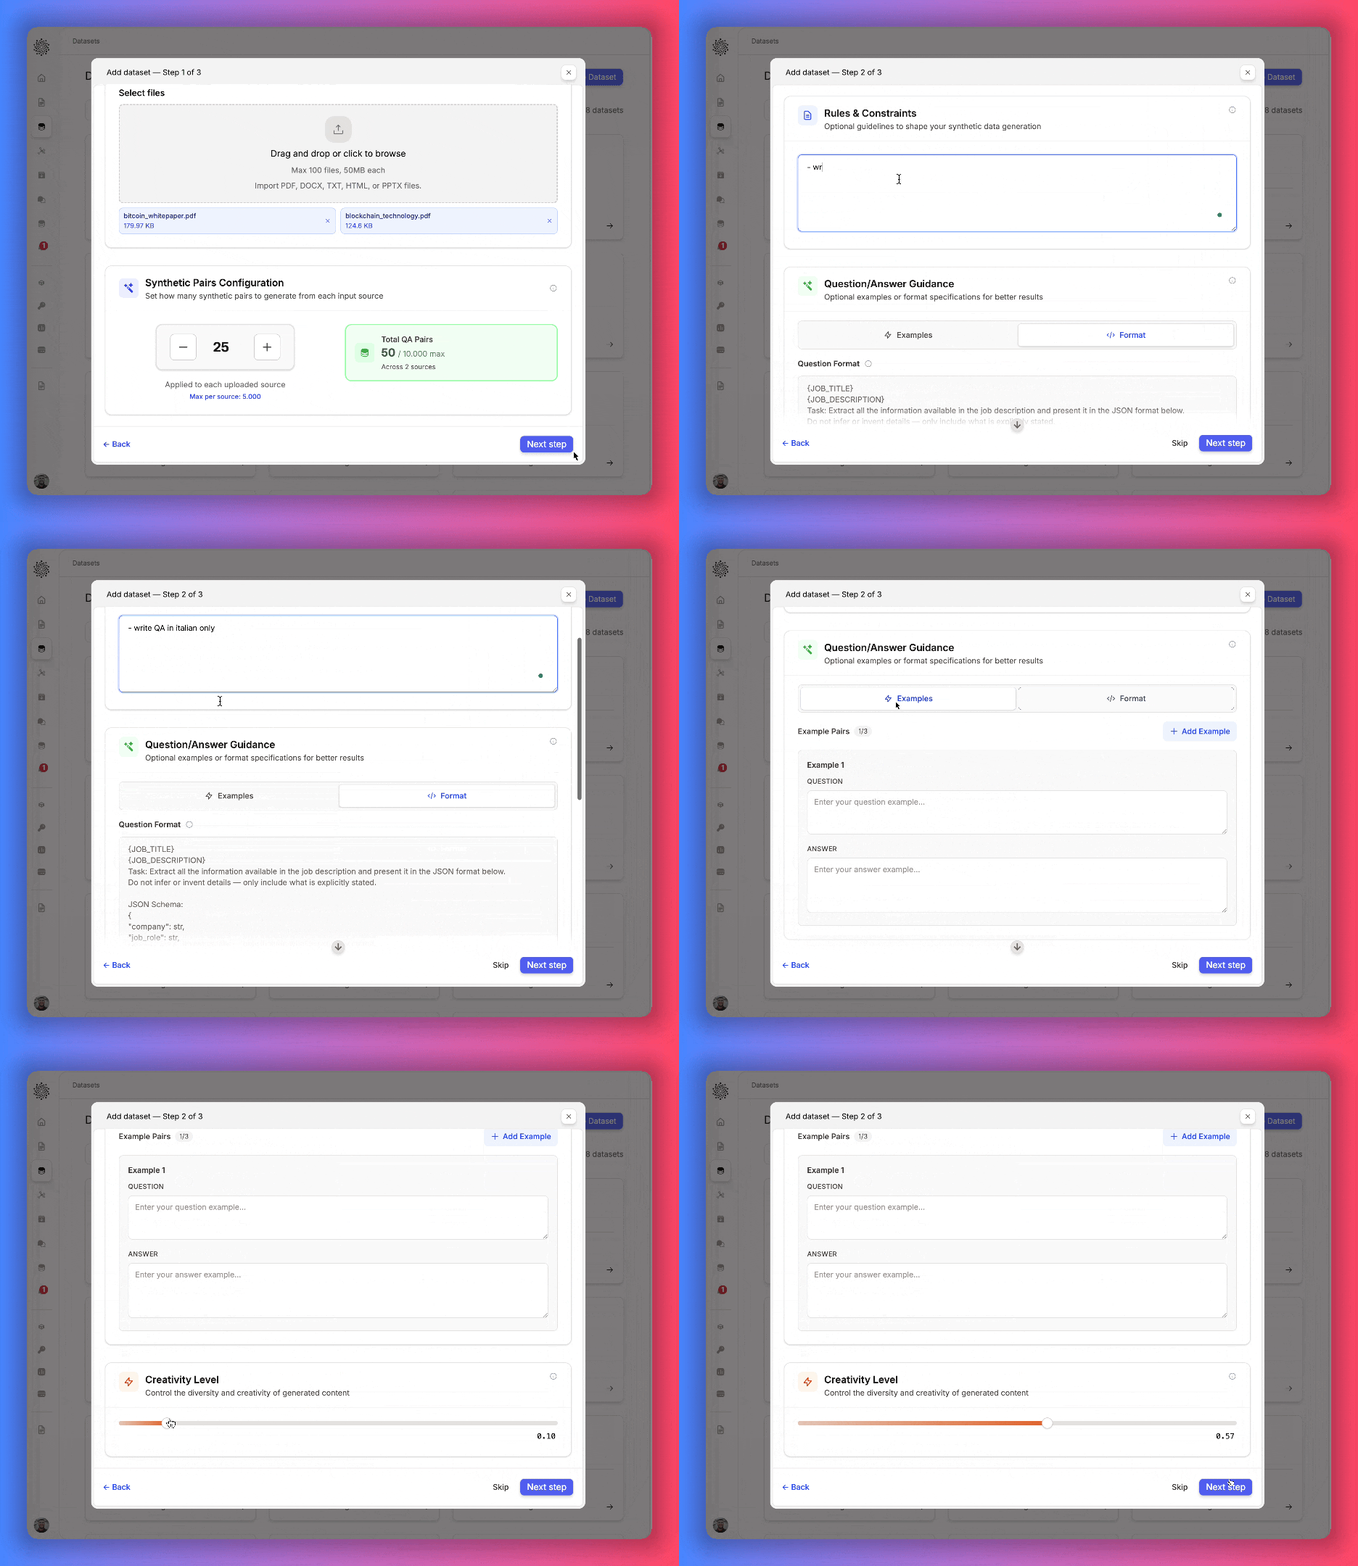
 Get control of the generation process by setting additional parameters:
* **Rules & Constraints** – add conditions for the generated content (e.g., enforce style, define tone, restrict scope).
* **QA Guidance** – provide example pairs or specify output formats.
* **Creativity Level** – adjust the model’s temperature to balance consistency vs. variety.
Get control of the generation process by setting additional parameters:
* **Rules & Constraints** – add conditions for the generated content (e.g., enforce style, define tone, restrict scope).
* **QA Guidance** – provide example pairs or specify output formats.
* **Creativity Level** – adjust the model’s temperature to balance consistency vs. variety.
 Review a recap of your settings from the previous steps.
Click **Create Dataset** to start the generation process.
Review a recap of your settings from the previous steps.
Click **Create Dataset** to start the generation process.
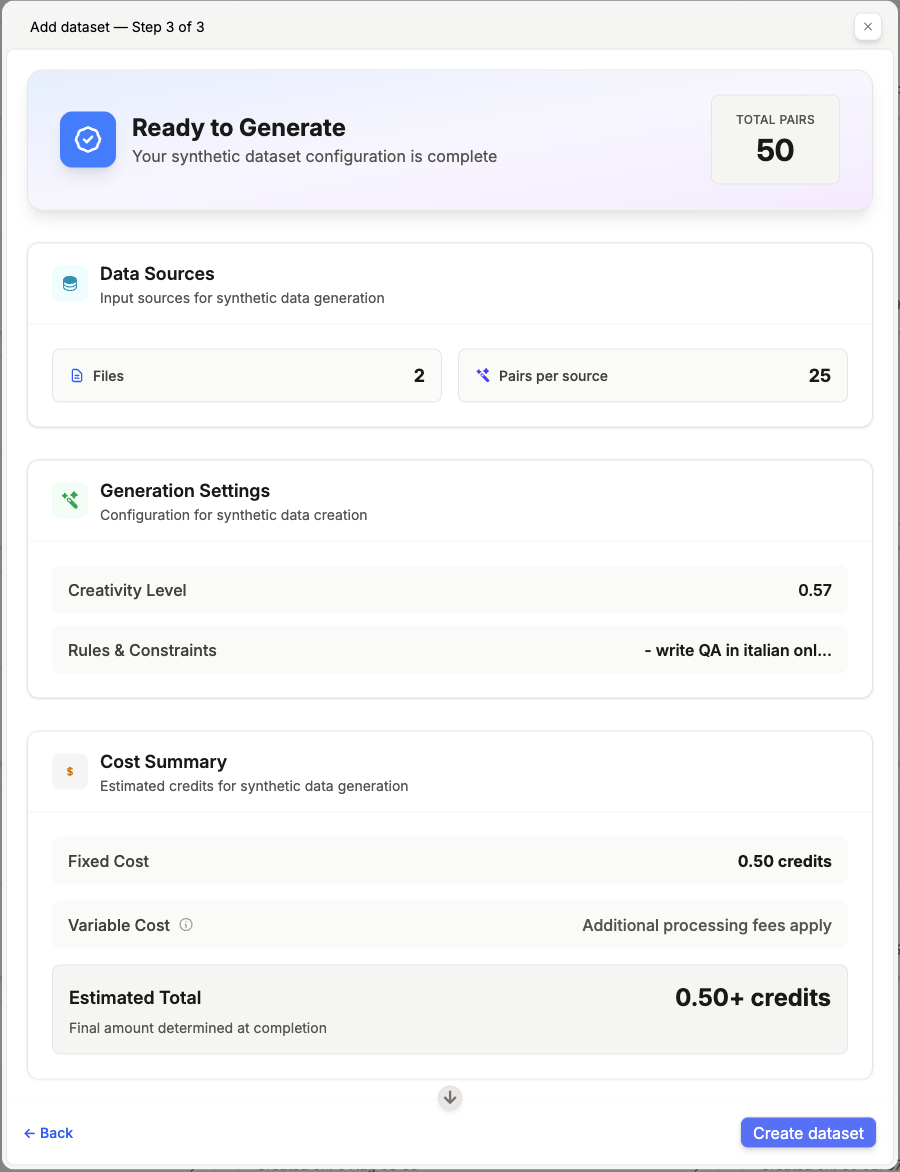 ### Options for Synthetic Data Generation
When generating synthetic datasets, you can configure:
* **Data Sources** – files, YouTube videos, websites, or a mix.
* **Synthetic Pairs Configuration** – number of QA pairs per input.
* **Rules & Constraints** – optional rules to shape the outputs.
* **QA Guidance** – add examples or output specifications.
* **Creativity Level** – control the randomness of the generation.
For deeper explanations and advanced usage, see our user guide on how to [Generate Dataset from Text Files](/guides/datasets/synthetic-data).
***
# Next Steps
Start a data augmentation job to add synthetic data to your dataset.
Create a snapshot of your dataset to save your current state.
Automatically split your dataset into training, validation, and test sets.
Fine-tune a model on your dataset.
### Options for Synthetic Data Generation
When generating synthetic datasets, you can configure:
* **Data Sources** – files, YouTube videos, websites, or a mix.
* **Synthetic Pairs Configuration** – number of QA pairs per input.
* **Rules & Constraints** – optional rules to shape the outputs.
* **QA Guidance** – add examples or output specifications.
* **Creativity Level** – control the randomness of the generation.
For deeper explanations and advanced usage, see our user guide on how to [Generate Dataset from Text Files](/guides/datasets/synthetic-data).
***
# Next Steps
Start a data augmentation job to add synthetic data to your dataset.
Create a snapshot of your dataset to save your current state.
Automatically split your dataset into training, validation, and test sets.
Fine-tune a model on your dataset.